Sunday, January 29, 2012

Native bees


Who doesn't love bees!


You have may have heard that in the last few years honey bees have suffered a catastrophic drop in numbers due to what is called colony collapse disorder. There are probably multiple causes for this major decline in honeybees including pesticide use, mites and fungal infections. As honey bees are the main pollinators for fruits, nuts and vegetables this is a very bad thing.

Lucky for us they are not the only pollinators out there. There are over 4000 types of native bees known in the US ( honey bees are not native, they were brought from Europe). There are two types of non nesting bees,  ground nesting and cavity nesting - I'm going to focus on the cavity nesters.

The orchard mason bees is a cavity nester. They can be blue, green or black and are slightly smaller then a honey bee. Female bees live solitary and make their nest in hollow reads or abandoned insect holes in wood. They lay their eggs and add pollen and nectar, creating individual cell for each egg. Then they take off and leave the bee babies to fend for them self. These native bees can fly at cooler temperatures then honey bees which helps to pollinate early flower crops like apples and blueberries.

orchard mason bee


You can help some of these native bees by providing nesting boxes in your garden. My garden gets lots of mason bees as well as a ridiculously large bumble bee type that nest in my bee box. This guy looks too heavy to fly, when I am working in the garden and one comes by you would think a humming bird went by your ear.

Nesting boxes for cavity bees are pretty easy to make you can find direction here

They are also pretty easy to buy which is what I did from  here or here .

.
bee homes


Within a month of putting this box up there was no more room at the inn, all the holes were taken- it was quite interesting to watch them come in and out some actually widened the holes and if you looked in you could see their little bee buts sticking out kicking sawdust out on the plants below. I took some great pictures this summer but can't find them but this is what they look like.


bee bums


So if you have any plants you want pollinated or if like me you think this kind of thing is cool, this is a great time of year to start thinking about adding a bee box to your yard.

Thursday, January 26, 2012

My pups...

Their Album Cover Shot


I collect rescue dogs the way some women collect shoes or bad men. I have a soft spot for a sad story and I really should never ever look at the SPCA website. I am holding firm at three and I hope it can stay that way- I thought I might introduce them to you.

Gracie- Grace is my first dog, I got her from the Marin County Humane Society when I lived in California. She was the first dog I saw in the first cage, she wasn't barking she was just leaning against the cage looking at me. Only six months old but already she had the marks of abuse- one of her eyes had an object poked in it so she was mostly blind in that eye. She was a funny looking thing which is why I think she was there the longest of any dog- I took her home the next day. Here is 13 year old Grace:

Her mug shot


Yes, I love her enough to let her dig a hole behind my viburnum


 Blue- We got Blue after loosing my husbands dog and Grace's companion, she was so sad we didn't wait more then two months before finding another dog. Grace is part cattle dog so when we saw a male cattle dog already on his second home and being put up for adoption again we figured it would be a great fit. Well it wasn't, she really didn't like him much so somehow we thought getting a third dogs was the answer. Here is Blue-


Blue at a shelter before he was adopted by his second family
Blue now- who wouldn't be happy in a field of daisies?


Lily- Don't necessarily try this your self but getting a third dog actually did help. She was from an unwanted litter in Alabama, the only thing we knew is that her mother was a cattle dog- her daddy was obviously some kind of hound. Blue loved her like a mother as soon as we got her and grace liked her too- all was well. Here is Lily-


Lily and Blue the week we got her- she had mange on her head

lily basking in the sun

Lily with her teddy


Gardening with three dogs presents some challenges but I wouldn't have it any other way. I will go over some dog proofing tips in further posts.

Monday, January 23, 2012

Terarriums

Terrariums are really just a closed transparent container used to raise plants. Once a terrarium is made it should need near to no care, not even water. It is it's own tiny ecosystem.

Back in the olden days New England housewives placed partridge berry in hand made glass bowls  late fall to bring in and enjoy inside for the winter. I can't go advocating gathering wild partridge berry, moss and lichen to make a terrarium but you can find worthy substitutes at a good full service nursery.

Terrarium plants at Wentworth greenhouse


 If you are local a great place to start would be Wentworth Greenhouse in Rollinsford NH. I was able to find several plants for my terrarium ranging from 99 cents to $3. You will want to use plants that can tolerate moist conditions and low light. Ideal plants would be mosses, babies tears, lucky bamboo and ferns- but go wild and try what you want as long as the foliage will fit in your container with out touching the sides. Please do what I didn't do and measure your container before you buy the plans to make sure they will fit!

What you will need;

A container with a lid, this can be a wire topped ball jar, a empty baby food container to some fancy shmancy apothecary jar like the one I got a TJ Max for $9.

Small rocks, these can be collected or you should be able to find them at a nursery or a pet store in the aquarium department.

Potting soil- I would recommend using sterilized potting soil, my first terrarium I used garden soil and with in a few months I had little moths hatching out and flying around. Because I am weird I felt bad for the moths. Just buy a small bag, you wont need much.

You can add a little charcoal in with the rocks, this helps to keep the air clean- you can find activated charcoal at a pet store in the aquarium section or at a nursery.

And plants!

Other things you can add- be creative! I made this terrarium for my nephew with dinosaurs in it.


This one I made with just greenery for a post Christmas display on my sideboard


The newest one I am making is with moss and lichen I got from the north side of my garage and some little chickens from Tractor Farm Supply. 

soil, rocks, charcoal and some moss

the rocks and some charcoal


And finished!

Thursday, January 19, 2012

Introduction

Me and my basil


I thought a post giving people a general idea as to who I am  might be in order. I have sat with my fingers on the key board thinking- who am I, for the last few minutes. Have you ever tried to explain who you are? It's not easy, so I will start with what I am not.

I am not a neat gardener, and absolute expert on all things gardening or a great writer.

What I am is someone who learns by trial and error, who has a degree in plant and soil science and who is dyslexic.

 A dyslexic with a blog, who loves plants.

 If you come to my house during the growing season you will not escape with out me showing you something;  a flower, a lady bug larvae or my worms. I wonder sometimes if people think I'm whacked but it really doesn't stop me, I can't help my self. I'm like the little kid in Jerry McGuire spouting out random facts. I figure at least here I know I may be reaching people who are interested in them rather then people who are backing away from me slowly while making up an excuse as to why they need to leave.

Here are a few pictures from my garden:


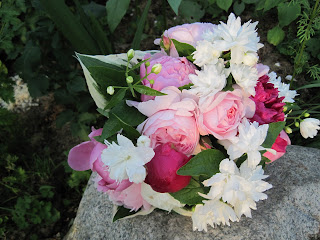
 I did go to school for plant and soil science with a concentration in horticulture and I spent 20 years running nurseries and landscaping for estates before I settled down to a nice desk job with benefits. I have a part time business as a wedding floral designer specializing in using locally grown flowers. The best part about that is that I get to write off all my plants as a business expense!

Here are a few pictures of my wedding flowers;


The dyslexia thing- I promise to spell check all my posts but I guarantee that you notice incorrect punctuation and the use of the wrong word now and then.The reason I put this out there is so you know I am not just being lazy or a complete uneducated idiot. I hope you enjoy my blog!


Tuesday, January 17, 2012

What to do with those Poinsettias after the Holidays


 You have two options, the first is to follow the instructions below;
January - March: Keep watering the poinsettia whenever the surface is dry.
April: Starting April 1st, gradually decrease water, allowing the plant to get dry between waterings. Be careful the stem does not begin to shrivel. This is a sign the plant is too stressed and is dying. In a week or two, when the plant has acclimated to this drying process, move it to a cool spot like the basement or a heated garage. You want to keep it at about 60 degrees F.
May: In mid-May, cut the stems back to about 4 inches and repot in a slightly larger container, with new potting soil. Water it well. Place the newly potted plant back into the brightest window you have and once again keep it at a temperature of 65 - 75 degrees F. Continue watering whenever the surface of the soil feels dry.
Watch for new growth. Once new growth appears, begin fertilizing every two weeks with a complete fertilizer. Follow fertilizer label recommendations.
June: More the poinsettia outside, pot and all. Keep it in a partially shaded location and maintain your watering and fertilizing schedule.
July: In early July, pinch back each stem by about one inch. This is to encourage a stout, well branched plant. If left unpinched, the poinsettia will grow tall and spindly.
August: By mid-August, the stems should have branched and leafed out. Once again, pinch or cut the new stems, leaving 3-4 leaves on each shoot. Bring the plant back indoors and back into your brightest window. Continue watering and fertilizing.
September: Continue regular watering and fertilizing. Make sure the temperature stays above 65 degrees F.
October Poinsettias are short-day plants, meaning their bud set is affected by the length of daylight. To re-bloom, poinsettias need about 10 weeks with 12 hours or less of sunlight per day. You will have to artificially create these conditions and it’s crucial that you be diligent.
Beginning October 1st, keep your plant in complete darkness from 5 pm to 8 am. Any exposure to light will delay blooming. Use an opaque box or material to block out light. Many people place their plants in a closest, but if light gets in through the cracks or if you open and use the closet, it will affect the bud set.
Move the plant back to the sunny window during the daytime and continue watering and fertilizing.
November: Around the last week of November, you can stop the darkness treatment and allow the plant to remain in the window. You should see flower buds at this point
December - Stop fertilizing about December 15th. Keep watering and treat your plant the way you did when you first brought it home in bloom. If all has gone well, it should be back in bloom and ready to begin the process all over again. 
 Or you can do this;


The first is too much work for me, I will just cough up another $4 for a new one next year. 

Saturday, January 14, 2012

Starting Annuals From Seed...

And why I don't do it anymore.

I love seed catalogs. I start to get them in the week after Christmas. They pile up on my nightstand and within a month they are dog eared and marked up with a page of notes attached. I used to love ordering packs of seeds, figuring out when to get them started and watching those cute little cotyledon leaves emerging ( just tossed out a horticulture term there, weird the random things you remember from college). Most of the time my seedlings would look like this;


What I was picturing after all that love, money and care was something more like this;


Minus the fancy label but you get the idea. I simply do not get enough direct sun to really get healthy plants so unless I want to buy grow lights and maybe heating lamps I will not get strong sturdy plants ready for spring. After years of trying this I finally gave up and just let the pro's grow my annuals. Besides each pack of seed would have like 100 seeds in it when I only really needed 6-10 plants so off to the nursery I go.

That said I am pretty picky when it comes to picking out my annuals. For those who live in the area I have three main sources that I recommend.

First, and my favorite is Ragged Robin Farm in Lee. She doesn't have a website but here is her basic information. http://www.localharvest.org/ragged-robin-herb-farm-M15830 . Terry grows everything from seed using a lot of great Johny Seed varieties. She has a small stand she puts out with her bedding plants in the spring, most of the time it is self serve with a small cash box- and she takes checks! Most of her flower varieties work well as cut flowers because she sells cut flowers later in the summer. She also has herbs and vegetables as well.

Second is http://www.studleyflowergardens.com/ in Rochester NH. They also grow their own annuals which is pretty rare for a nursery these days. They  have a lot of herbs and cut flowers and the owner has the dreamiest blue eyes- really it is worth the trip just to see him.

Third is http://www.rollinggreennursery.com/ in Greenland NH. I worked at a lot of nurseries both in NE and out west and this has to be the cleanest and most well staffed nursery I have ever been to. I go there when I am stressed just to walk down the perfectly maintained grass isles and look at the perfect pots of flowers in their perfect little rows. They bring order to the universe.

If you don't live in the area, here is what I look for when picking out my annuals. Make sure there are not missing plants in the pack or worse a plant that is wilted or moldy. Don't buy plants that are very tall and narrow like they have been reaching for the sun. Also I prefer if they don't have flowers yet ( the picture above was just a good example) this gives the plant time to focus on leaf and root growth which will give you a larger happier plant later on.

Plants should be hardened off if the are in a northern climate which means for a period of time they have been exposed to the cooler air outside the greenhouse for longer periods each day so the plant doesn't go into shock when you plant it. And last of all, bring a few friends- Some plants I may only want 2-3 three (think tomato varieties) so if you have a few friends you can mix and match your six-packs.

Happy shopping!

Friday, January 13, 2012

Dahlia's

Well, it is winter and I am going to start a blog about flowers! This is what it looks like outside;


This is what I look like right now;


That's me, my happy light, vitamin D, citrus fruit and a plant catalog- this is how I get by with the NE winter. I have lived here most of my life and I love the seasons changing but if I could spend the winter sleeping and occasionally getting up to eat marshmallows I would. Seriously.

The catalog I am eying in the picture is Swan Island Dahlias http://www.dahlias.com/  If you are unfamiliar with Dahlias- you are missing out- or your not a gardener, in which case I'm not sure why you are reading this. Dahlias are an amazingly versatile easy plant as long as you have full sun. If you don't have full sun- don't waste your money, you will end up with a large green spindly blob. To give you an idea of the variety of sized and colors them come in ( I love pictures- show and tell was my favorite past of school)


 Here is a few pictures from my garden and in an arrangement this summer


Most of these Dahlia's are in the $4-$5 dollar range each so they are pretty affordable and will give color to your garden from July until frost. I mostly grow the "B" size which is 6 inches or less for the flowers, I find they produce more flowers for cutting and the plants don't have to be staked like the larger Dahlias do. You can dig them up and store them in a cool location to replant in the spring, I have had about a 50% success rate with doing this.

A few hints- When you put them in in the spring it takes a while for them to emerge so mark the spot with a bamboo stick- which will come in handy if and when you need to stake them. If you are like me you will plant something else on top of them before the emerge because you have forgotten where you planted them. Blank spaces don't last long in my garden.

You cannot over water a dahlia- if you are hand watering them it is not enough. I am a huge advocate of soaker hoses or sprinklers. You are always better watering deeply less frequently then a little each day- this encourages the plants to create a good deep root system. Watering early in the morning is best, you are not loosing as much to evaporation and the plants are not wet for hours which can cause fungal diseases.

Well, that is it fro my first blog post- if there is a garden and floral design question you want answered let me know- I may not be able to answer it but I will give it a try or make something up that sounds good.